
VMware Tanzu Mission Control is a SaaS-based offering for Kubernetes fleet management and more. It provides a global control plane to all your Kubernetes clusters in different environments such as public cloud, private cloud, or edge. Nevertheless, there are multiple situations where SaaS cannot be leveraged due to compliance or data governance requirements. These requirements are often referred to as data sovereignty and are subject to the laws of the respective countries. With the release of VMware Tanzu Mission Control Self-Managed (TMC Self-Managed), there is nothing in the way to provide Kubernetes fleet management and runtime for environments with sovereign requirements.
TMC Self-Managed comes as a Tanzu Package, can be installed on-prem, and does not require internet connectivity. It can be installed on different flavors of Kubernetes. In this blog post, I will demonstrate how to deploy it with VMware Tanzu Kubernetes Grid (TKG) in a fully air-gapped environment.
Pre-Requisites
The documentation for an air-gapped TKG (aka TKGM, aka TKG Standalone Management Cluster) installation can be found here and will not be covered in this post. Nevertheless, I will touch on some of the requirements that are also needed for TMC Self-Managed. The official documentation for TMC Self-Managed can be found here.
1. Jumpbox / Client
First, we need a jumpbox VM that we use as our client. This is a requirement for TKG and TMC Self-Managed. The tmc-sm command is currently available for Linux only. Hence we need a Linux VM, and we will use Ubuntu for this guide. This guide assumes that the jumpbox VM has internet access to download images and sources. Everything else will be running without internet connectivity. Ensure all the tools and CLIs for TKG are installed and available as described here, and download the TMC Self-Managed binaries from here.
Note: Make sure you have enough disc space to download and transfer the sources (binaries and images).
I recommend at least 65GB of free space to be on the safe side. The TKG image repository transfer will use the majority of it. TMC Self-Managed itself is approx. 5GB in size.
The main tools and commands we are going to use during the installation are listed here:
- docker
- tanzu cli
- imgpkg
- helm
- kubectl
- tmc-sm
- openssl
2. DNS
We need to create a DNS domain with various A records to ensure proper name resolution and communication between all the TMC Self-Managed services. The complete list of records can be found here. Nevertheless, It is also possible to work with a wildcard DNS entry instead. The load balancer IP is the address of the contour-envoy service that can be specified as part of the installation process.
| Record Type | Record Name | Value |
| A | *.<my-tmc-dns-zone> | load balancer IP |
| A | <my-tmc-dns-zone> | load balancer IP |
Note: It is important that you create the wildcard A record and another A record for the domain itself, as this will be the TMC Self-Managed URL!
In this example, I have used a bind9 DNS server with a separate zone for the TMC Self-Managed subdomain “tmc.beyondelastic.demo”. See the following example for your reference:
$TTL    86400 ; 24 hours could have been written as 24h or 1d
; $TTL used for all RRs without explicit TTL value
$ORIGIN tmc.beyondelastic.demo.
@  1D  IN  SOA audns.tmc.beyondelastic.demo. hostmaster.tmc.beyondelastic.demo. (
              2002022401 ; serial
              3H ; refresh
              15 ; retry
              1w ; expire
              3h ; minimum
             )
         IN  NS     audns
         IN  A     10.197.107.172
audns    IN  A     10.197.79.102
*        IN  A     10.197.107.172
Additionally, we need to create a DNS record for the OIDC provider, which will be Keycloak in our scenario, and another record for Harbor.
| Record Type | Record Name | Value |
| A | harborvm.<your-domain> | x.x.x.x |
| A | keycloak.<your-domain> | x.x.x.x |
3. Certificates / Trust
TMC Self-Managed uses cert-manager ClusterIssuer to generate certificates for its services. The ClusterIssuer can be configured in different modes such as SelfSigned, CA, External, ACME, Vault, or Venafi. Currently, it is not possible to import manually created certificates.
This guide will use the CA option and generate our own CA via OpenSSL on the jumpbox VM. This is an essential requirement, as all components must trust each other. See the following trust relationship map.

If you plan to use the same approach, you can follow the steps to create your own CA from the jumpbox VM.
➜  ~ openssl genrsa -out myCA.key 2048
Generating RSA private key, 2048 bit long modulus (2 primes)
.....+++++
...........................+++++
e is 65537 (0x010001)
➜  ~ openssl req -x509 -new -nodes -key myCA.key -sha256 -days 1825 -out myCA.pem
You are about to be asked to enter information that will be incorporated
into your certificate request.
What you are about to enter is what is called a Distinguished Name or a DN.
There are quite a few fields but you can leave some blank
For some fields there will be a default value,
If you enter '.', the field will be left blank.
-----
Country Name (2 letter code) [AU]:DE
State or Province Name (full name) [Some-State]:Bavaria
Locality Name (eg, city) []:Munich
Organization Name (eg, company) [Internet Widgits Pty Ltd]:Beyondelastic
Organizational Unit Name (eg, section) []:Lab
Common Name (e.g. server FQDN or YOUR name) []:Beyondelastic
Email Address []:alexander.ullah@gmail.com
Note: Make sure not to encrypt the CA key as cert-manager won’t like it and run into issues as described here.
We now have our own CA and can sign certificates for our services, such as Harbor or OIDC. Let’s continue creating a certificate signing request (csr) for Harbor.
➜  ~ openssl genrsa -out harbor.key 2048
Generating RSA private key, 2048 bit long modulus (2 primes)
..+++++
....+++++
e is 65537 (0x010001)
➜  ~ openssl req -new -key harbor.key -out harbor.csr
You are about to be asked to enter information that will be incorporated
into your certificate request.
What you are about to enter is what is called a Distinguished Name or a DN.
There are quite a few fields but you can leave some blank
For some fields there will be a default value,
If you enter '.', the field will be left blank.
-----
Country Name (2 letter code) [AU]:DE
State or Province Name (full name) [Some-State]:Bavaria
Locality Name (eg, city) []:Munich
Organization Name (eg, company) [Internet Widgits Pty Ltd]:Beyondelastic
Organizational Unit Name (eg, section) []:Lab
Common Name (e.g. server FQDN or YOUR name) []:harborvm.beyondelastic.demo
Email Address []:alexander.ullah@gmail.com

Please enter the following 'extra' attributes
to be sent with your certificate request
A challenge password []:
An optional company name []:Beyondelastic
Before signing the certificate, we will create a certificate extension config file, “harbor.ext” to specify the Subject Alternative Names (SAN). The file could look like the following example:
authorityKeyIdentifier=keyid,issuer
basicConstraints=CA:FALSE
keyUsage = digitalSignature, nonRepudiation, keyEncipherment, dataEncipherment
subjectAltName = @alt_names

[alt_names]
DNS.1 = harborvm.beyondelastic.demo
DNS.2 = 10.197.79.180
Let’s create the Harbor certificate via our CA with the following command.
➜  ~ openssl x509 -req -in harbor.csr -CA myCA.pem -CAkey myCA.key -CAcreateserial -out harbor.crt -days 825 -sha256 -extfile harbor.ext
Signature ok
subject=C = DE, ST = Bavaria, L = Munich, O = Beyondelastic, OU = Lab, CN = harborvm.beyondelastic.demo, emailAddress = alexander.ullah@gmail.com
Getting CA Private Key
We have our Harbor certificate and can repeat the same approach for our OIDC service. In this guide, I will use Keycloak as the OIDC identity provider. Please repeat the steps above to generate a certificate for Keycloak, starting with the csr. If you have an existing OIDC provider you want to use, you can skip it. The TMC Self-Managed certificates will be autogenerated by the cert-manager ClusterIssuer using our CA key and certificate.
4. Harbor Container Registry
We need an on-prem container registry to store images for TMC Self-Managed and TKG, as we don’t have internet connectivity and cannot pull images from a public registry. Follow the guide to deploy an offline Harbor registry via OVA described here. I will not cover the installation process in this post but use a certificate signed by our previously created CA or from a company-wide trusted CA.
The default configuration of the Harbor VM deployment is 40GB, which you might have to extend as described here if you plan to upload additional images. The mandatory images for TKG Standalone Management Cluster and TMC Self-Managed will roughly take up 22GB of space, so you have some buffer. Nevertheless, planning more generously from the begging is a good idea.
One stumbling block I want you to know is that you must specify the complete FQDN in the “Hostname” field during the OVA deployment. If you only specify the hostname, the Harbor installation won’t be fully functional.

5. Transfer Images
As part of an air-gapped TKG installation, you must transfer the required TKG repository to your Harbor registry with the tanzu cli and the “isolated-cluster” plugin as described here. Additionally, we need to move the TMC Self-Managed images.
Even though you should have done this already for the TKG image transfer, make sure that docker and our jumpbox VM are trusting our Harbor certificate by executing the following steps:
➜  ~ sudo mkdir /etc/docker/certs.d/harborvm.yourdomain.com
➜  ~ sudo cp myCA.pem /etc/docker/certs.d/harborvm.yourdomain.com/ca.crt
➜  ~ sudo systemctl restart docker
➜  ~ docker login harborvm.beyondelastic.demo
Username: admin
Password:
WARNING! Your password will be stored unencrypted in /home/aullah/.docker/config.json.
Configure a credential helper to remove this warning. See
https://docs.docker.com/engine/reference/commandline/login/#credentials-store

Login Succeeded
➜  ~ sudo cp myCA.pem /usr/local/share/ca-certificates/myCA.crt
➜  ~ sudo update-ca-certificates
Updating certificates in /etc/ssl/certs...
rehash: warning: skipping ca-certificates.crt,it does not contain exactly one certificate or CRL
1 added, 0 removed; done.
Running hooks in /etc/ca-certificates/update.d...
done.
TMC Self-Managed Images
If the docker login command is successful, we can continue. We need to create a public project in our Harbor container registry first. We will name it simply “tmc”.

As a next step, we need to create a “tmc-sm” folder on our jumpbox VM and extract the TMC Self-Managed tar file.
➜  ~ mkdir tmc
➜  ~ tar -xf tmc-self-managed-1.0.0.tar -C ./tmc
Know, we can start the image transfer with the following command.
➜  ~ cd tmc/
➜  ~ ./tmc-sm push-images harbor --project harborvm.beyondelastic.demo/tmc --username admin --password ...
...
INFO[0014] Pushing image                                 progress=75/77 uri=harborvm.beyondelastic.demo/tmc/498533941640.dkr.ecr.us-west-2.amazonaws.com/extensions/tmc-observer/tmc-observer
INFO[0014] Pushing image                                 progress=76/77 uri=harborvm.beyondelastic.demo/tmc/498533941640.dkr.ecr.us-west-2.amazonaws.com/extensions/vsphere-resource-retriever/manifest
INFO[0014] Pushing image                                 progress=77/77 uri=harborvm.beyondelastic.demo/tmc/498533941640.dkr.ecr.us-west-2.amazonaws.com/extensions/vsphere-resource-retriever/server
INFO[0015] Pushing PackageRepository                     uri=harborvm.beyondelastic.demo/tmc/package-repository
Image Staging Complete. Next Steps:
Setup Kubeconfig (if not already done) to point to cluster:
export KUBECONFIG={YOUR_KUBECONFIG}

Create 'tmc-local' namespace: kubectl create namespace tmc-local

Download Tanzu CLI from Customer Connect (If not already installed)

Update TMC Self Managed Package Repository:
Run: tanzu package repository add tanzu-mission-control-packages --url "harborvm.beyondelastic.demo/tmc/package-repository:1.0.0" --namespace tmc-local

Create a values based on the TMC Self Managed Package Schema:
View the Values Schema: tanzu package available get "tmc.tanzu.vmware.com/1.0.0" --namespace tmc-local --values-schema
Create a Values file named values.yaml matching the schema

Install the TMC Self Managed Package:
Run: tanzu package install tanzu-mission-control -p tmc.tanzu.vmware.com --version "1.0.0" --values-file values.yaml --namespace tmc-local

There are additional images required for the Inspection functionality of TMC Self-Managed. Please follow the documentation if you plan to use this feature.
Tanzu Packages Repository for TMC Catalog
Additionally, we need to transfer the Tanzu Packages standard repository for the TMC Catalog functionality.
Note: The target location needs to be the same “tmc” harbor project that we used above, and the target location tag needs to be precisely “498533941640.dkr.ecr.us-west-2.amazonaws.com/packages/standard/repo” as it is currently hardcoded as the catalog repository location in TMC Self-Managed 1.0.0.
➜  ~ imgpkg copy --registry-ca-cert-path=harbor.crt -b projects.registry.vmware.com/tkg/packages/standard/repo:v2.2.0_update.2 --to-repo harborvm.beyondelastic.demo/tmc/498533941640.dkr.ecr.us-west-2.amazonaws.com/packages/standard/repo
copy | exporting 243 images...
copy | will export projects.registry.vmware.com/tkg/cert-manager-cainjector@sha256:118234eeea62d46a76cc0c73bcedcfaad7da088a29b5a6a7ef6c1502be97c72e
copy | will export projects.registry.vmware.com/tkg/cert-manager-cainjector@sha256:4a85c7fbe3ae3fc0d8af7a3d36c81852acd7775b9410f7769fd625c7ecc09649
copy | will export projects.registry.vmware.com/tkg/cert-manager-cainjector@sha256:686813becb0492f5f5be1b0619229f7cc34863517f93ff6ee7d454133b1ef1ba
copy | will export projects.registry.vmware.com/tkg/cert-manager-cainjector@sha256:7228cf1eb079a7b62b505e4ec069251ee9499d1caeb8b1599f93e248fc1f1443
...
copy | exported 243 images
copy | importing 243 images...

7.45 GiB / 7.45 GiB [------------------------------------------------------------------------------------------------------------------------------------------------------------->] 99.98% 21.70 MiB p/s
copy |
copy | done uploading images
copy | Tagging images

Succeeded
Keycloak Helm Chart and Images
Lastly, we need to transfer the Helm chart and images for Keycloak to our registry. We are pulling the chart from the Bitnami helm chart repository and pushing it to our Harbor instance.
We must create a public project within our Harbor registry named “bitnami”.

Note: Make sure your Helm version is at most version v3.8.0 for the next step!
We continue by executing the following helm commands from the jumpbox VM to transfer the Keycloak chart:
➜  ~  helm repo add bitnami https://charts.bitnami.com/bitnami
"bitnami" has been added to your repositories
➜  ~  helm repo update
Hang tight while we grab the latest from your chart repositories...
...Successfully got an update from the "bitnami" chart repository
Update Complete. ⎈Happy Helming!⎈
➜  ~  helm pull bitnami/keycloak
➜  ~  helm registry login harborvm.beyondelastic.demo
Username: admin
Password: …
Login Succeeded
➜  ~  helm push keycloak-15.1.7.tgz oci://harborvm.beyondelastic.demo/bitnami
Pushed: harborvm.beyondelastic.demo/bitnami/keycloak:15.1.7
Digest: sha256:be5b2a42817f742ee5534a72fd97a805fd5d168d27658f1d5c0a6a5d1825a1f5
Before we move on, double-check the image reference (tag) in the chart’s values.yaml file. You might need to adjust the next steps with up2date image tags. We now make use of the docker cli to pull, tag and push the required Keycloak container image:
➜  ~  docker pull bitnami/keycloak:21.1.2-debian-11-r5
21.1.2-debian-11-r5: Pulling from bitnami/keycloak
9318b6821852: Pull complete
Digest: sha256:d5287a1a343112900f9c86ad4e59f97a1f14a55071d5925f7446fdda215442a3
Status: Downloaded newer image for bitnami/keycloak:21.1.2-debian-11-r5
docker.io/bitnami/keycloak:21.1.2-debian-11-r5
➜  ~  docker tag bitnami/keycloak:21.1.2-debian-11-r5 harborvm.beyondelastic.demo/bitnami/keycloak:21.1.2-debian-11-r5
➜  ~  docker push harborvm.beyondelastic.demo/bitnami/keycloak:21.1.2-debian-11-r5
The push refers to repository [harborvm.beyondelastic.demo/bitnami/keycloak]
c79f93f10da0: Pushed
21.1.2-debian-11-r5: digest: sha256:264e24c0c4315938b3d17461607be74656d3938c8fd1c6a7dc455d6df8bce5f3 size: 530
Also, transfer the PostgreSQL container image required by Keycloak:
➜  ~ docker pull bitnami/postgresql:15.3.0-debian-11-r17
15.3.0-debian-11-r17: Pulling from bitnami/postgresql
f0caa18d5e4a: Pull complete
Digest: sha256:7f6b00d6b84b0f3115c15aa06694c4dc80e4999ef7ba2b30ec31fc4ded904f13
Status: Downloaded newer image for bitnami/postgresql:15.3.0-debian-11-r17
docker.io/bitnami/postgresql:15.3.0-debian-11-r17
➜  ~ docker tag bitnami/postgresql:15.3.0-debian-11-r17 harborvm.beyondelastic.demo/bitnami/postgresql:15.3.0-debian-11-r17
➜  ~ docker push harborvm.beyondelastic.demo/bitnami/postgresql:15.3.0-debian-11-r17
The push refers to repository [harborvm.beyondelastic.demo/bitnami/postgresql]
1b11daf19ed9: Pushed
15.3.0-debian-11-r17: digest: sha256:58f9fb1da47ab02b8a9df47e61d620ba8e4616fe07158bca0039f397fdf3d408 size: 529
We can move on to the next step if we have successfully transferred all images.
6. TKG
We need to deploy a Kubernetes cluster that we can use for the TMC Self-Managed installation. In this guide, I will use TKG 2.2 for it. The air-gapped installation of TKG is not covered in this blog post. However, we must add our CA to the TKG Management and Workload clusters to establish a trust relationship with TMC Self-Managed and Harbor. The best way to accomplish this is to add the myCA.pem certificate in a base64 encoded string via the TKG_PROXY_CA_CERT config parameter of the flat TKG cluster manifest prior to the deployment.
➜  ~ base64 -i myCA.pem -w0
LS0tLS1CRUdJTiBDRVJUSUZJQ0FURS0tLS0tCk1JSUVFekNDQXZ1Z0F3SUJBZ0lVREdvcnVtNj...T2tPanJqdUN5UDFSSjZMCmx5eUl3Y0wydEJXS1ljckIxWFMzSHVmdnJpOCs4T2l0VWFTTm5wREd3enhpT0huTHdXS0EKLS0tLS1FTkQgQ0VSVElGSUNBVEUtLS0tLQo=
...
WORKER_ROLLOUT_STRATEGY: ""
TKG_PROXY_CA_CERT: "LS0tLS1CRUdJTiBDRVJUS..."
...
For a class-based TKG cluster manifest, it can be specified like this:
...
    - name: auditLogging
      value:
        enabled: false
    - name: trust
      value:
        additionalTrustedCAs:
        - data: LS0tLS1CRUdJTiBDRVJUSUZJQ0FURk1JSURz0FURS0tLS0tC...
          name: proxy
    - name: podSecurityStandard
      value:
...
Suppose you have a TKG 2.x cluster already running. In that case, you can add the CA by editing the cluster object on the TKG Management cluster and inserting a similar class-based configuration, as shown above.
➜ ~ kubectl -n tkg-system edit cluster tkgm-mgmt
This will trigger a rolling update of the cluster, and after its completion, the CA will be available on every node.
TMC Self-Managed TKG Workload Cluster
For TMC Self-Managed, we need a TKG Workload cluster with Kubernetes version 1.23.x, 1.24.x, 1.25.x, and the following minimal resource configuration.
- 1x Control Plane
- 4 vCPUs
- 8 GB RAM
- 40 GB storage
- 3 Worker Nodes
- 4 vCPUs
- 8 GB RAM
- 40 GB storage
This post does not cover the TKG Workload cluster creation; look at the TKG 2.2 documentation here.
As soon as we have the TKG Workload cluster up and running, we need to deploy cert-manager onto it. This can quickly be done via a Tanzu Package installation. But first, we need to add the Tanzu Package standard repository we transferred earlier.
➜  ~  tanzu package repository add tanzu-standard --url harborvm.beyondelastic.demo/tmc/498533941640.dkr.ecr.us-west-2.amazonaws.com/packages/standard/repo:v2.2.0_update.2 --namespace tkg-system

Waiting for package repository to be added

5:31:43PM: Waiting for package repository reconciliation for 'tanzu-standard'
5:31:43PM: Fetch started
5:31:43PM: Fetching
	    | apiVersion: vendir.k14s.io/v1alpha1
	    | directories:
	    | - contents:
	    |   - imgpkgBundle:
	    |       image: harborvm.beyondelastic.demo/tmc/498533941640.dkr.ecr.us-west-2.amazonaws.com/packages/standard/repo@sha256:f3389edab8fa22ed37200170cc635a0c0a972e6e1186da2759c0c39e8347b853
	    |       tag: v2.2.0_update.2
	    |     path: .
	    |   path: "0"
	    | kind: LockConfig
	    |
5:31:43PM: Fetch succeeded
5:31:45PM: Template succeeded
5:31:45PM: Deploy started (3s ago)
5:31:48PM: Deploying
	    | Target cluster 'https://100.64.0.1:443'

...

(data.packaging.carvel.dev/v1alpha1) namespace: tkg-system
	    | 5:31:48PM: ok: noop packagemetadata/grafana.tanzu.vmware.com (data.packaging.carvel.dev/v1alpha1) namespace: tkg-system
	    | 5:31:48PM: ok: noop packagemetadata/fluent-bit.tanzu.vmware.com (data.packaging.carvel.dev/v1alpha1) namespace: tkg-system
	    | 5:31:48PM: ok: noop package/harbor.tanzu.vmware.com.2.2.3+vmware.1-tkg.1 (data.packaging.carvel.dev/v1alpha1) namespace: tkg-system
	    | 5:31:48PM: ok: noop package/fluxcd-helm-controller.tanzu.vmware.com.0.21.0+vmware.1-tkg.1 (data.packaging.carvel.dev/v1alpha1) namespace: tkg-system
	    | 5:31:48PM: ---- applying complete [94/94 done] ----
	    | 5:31:48PM: ---- waiting complete [94/94 done] ----
	    | Succeeded
5:31:48PM: Deploy succeeded
➜  ~  tanzu package available list

  NAME                                          DISPLAY-NAME
  cert-manager.tanzu.vmware.com                 cert-manager
  contour.tanzu.vmware.com                      contour
  external-dns.tanzu.vmware.com                 external-dns
  fluent-bit.tanzu.vmware.com                   fluent-bit
  fluxcd-helm-controller.tanzu.vmware.com       Flux Helm Controller
  fluxcd-kustomize-controller.tanzu.vmware.com  Flux Kustomize Controller
  fluxcd-source-controller.tanzu.vmware.com     Flux Source Controller
  grafana.tanzu.vmware.com                      grafana
  harbor.tanzu.vmware.com                       harbor
  multus-cni.tanzu.vmware.com                   multus-cni
  prometheus.tanzu.vmware.com                   prometheus
  whereabouts.tanzu.vmware.com                  whereabouts
Now we can run the following commands to install cert-manager via Tanzu cli.
➜  ~ kubectl create ns packages
namespace/packages created
➜  ~ tanzu package install cert-manager --package cert-manager.tanzu.vmware.com --version 1.10.2+vmware.1-tkg.1 -n packages

5:35:35PM: Creating service account 'cert-manager-packages-sa'
5:35:35PM: Creating cluster admin role 'cert-manager-packages-cluster-role'
5:35:35PM: Creating cluster role binding 'cert-manager-packages-cluster-rolebinding'
5:35:35PM: Creating overlay secrets
5:35:35PM: Creating package install resource
5:35:35PM: Waiting for PackageInstall reconciliation for 'cert-manager'
5:35:35PM: Fetch started
5:35:35PM: Fetching
	    | apiVersion: vendir.k14s.io/v1alpha1
	    | directories:
	    | - contents:
	    |   - imgpkgBundle:
	    |       image: harborvm.beyondelastic.demo/tmc/498533941640.dkr.ecr.us-west-2.amazonaws.com/packages/standard/repo@sha256:abd6ff1fefff3dac62f16a185343722dc04eb08616871d4e9c84ece3b283e813
	    |     path: .
	    |   path: "0"
	    | kind: LockConfig
	    |
5:35:35PM: Fetch succeeded
5:35:36PM: Template succeeded
5:35:36PM: Deploy started (2s ago)
5:35:38PM: Deploying

...

	    | 5:35:55PM: ---- applying complete [47/47 done] ----
	    | 5:35:55PM: ---- waiting complete [47/47 done] ----
	    | Succeeded
5:35:55PM: Deploy succeeded
Note: The contour ingress controller will be deployed as part of the TMC Self-Managed package and should not be installed beforehand.
Create ClusterIssuer
Now that we have cert-manager installed on our TKG Workload cluster, we can create the necessary ClusterIssuer. Please prepare the following manifest using the bas64 encoded strings of our myCA.pem and myCA.key files created earlier.
apiVersion: v1
kind: Secret
metadata:
  name: local-ca
  namespace: cert-manager
data:
  tls.crt: LS0tLS1CRUdJTiBD...
  tls.key: LS0tLS1CRUdJTiBS...
type: kubernetes.io/tls
---
apiVersion: cert-manager.io/v1
kind: ClusterIssuer
metadata:
  name: local-issuer
spec:
  ca:
    secretName: local-ca
Apply the manifest on our cluster and check the results.
➜  ~ kubectl apply -f issuer.yaml
secret/local-ca created
clusterissuer.cert-manager.io/local-issuer created
➜  ~ kubectl get clusterissuer
NAME           READY   AGE
local-issuer   True    14s
➜  ~ kubectl get secret -n cert-manager
NAME                          TYPE                             DATA   AGE
cert-manager-registry-creds   kubernetes.io/dockerconfigjson   1      2d20h
cert-manager-webhook-ca       Opaque                           3      2d20h
local-ca                      Opaque                           2      3m4s
The ClusterIssuer has been created, and we can continue with the Keycloak installation.
7. OIDC / Keycloak
For Authentication, we need to provide an OIDC-compliant identity provider. If you already have an OIDC service in your environment, we can use it instead of deploying Keycloak. Nevertheless, In this guide, we will use Keycloak for it and deploy it via a helm chart. We can decide to install it on a separate shared services TKG cluster or on the same cluster that we use for TMC Self-Managed. In this case, I want to make it compact, and we will install it on the same cluster.
Keycloak Helm Deployment
It is necessary to use HTTPS for Keycloak to ensure TLS-encrypted communication between TMC Self-Managed, specifically Pinniped and Keycloak. We will use our previously created keycloak certificated and key to achieve this. First, we will create a keycloak namespace and a secret with the required data.
➜  ~ kubectl create ns keycloak
namespace/keycloak created
➜  ~ kubectl create secret tls keycloak-tls --cert=keycloak.crt --key=keycloak.key -n keycloak
secret/keycloak-tls created
Prepare the following values.yaml file for the chart configuration:
global:
  imageRegistry: "harborvm.beyondelastic.demo"
auth:
  adminUser: user
  adminPassword: "VMware1!"
tls:
  enabled: true
  autoGenerated: false
  existingSecret: "keycloak-tls"
  usePem: true
service:
  type: LoadBalancer
Install Keycloak via helm on your TKG cluster:
➜  ~ helm install keycloak oci://registry-1.docker.io/bitnamicharts/keycloak -f values.yaml -n keycloak
Pulled: registry-1.docker.io/bitnamicharts/keycloak:15.1.7
Digest: sha256:f5b0c0433fc4d1de9527bf3d9f95cc5b66594e04aded3591a7c1b78c288c161c
NAME: keycloak
LAST DEPLOYED: Fri Jul 21 21:13:13 2023
NAMESPACE: keycloak
STATUS: deployed
REVISION: 1
TEST SUITE: None
NOTES:
CHART NAME: keycloak
CHART VERSION: 15.1.7
APP VERSION: 21.1.2

** Please be patient while the chart is being deployed **

Keycloak can be accessed through the following DNS name from within your cluster:

    keycloak.keycloak.svc.cluster.local (port 80)

To access Keycloak from outside the cluster execute the following commands:

1. Get the Keycloak URL by running these commands:

  NOTE: It may take a few minutes for the LoadBalancer IP to be available.
        You can watch its status by running 'kubectl get --namespace keycloak svc -w keycloak'

    export HTTP_SERVICE_PORT=$(kubectl get --namespace keycloak -o jsonpath="{.spec.ports[?(@.name=='http')].port}" services keycloak)
    export HTTPS_SERVICE_PORT=$(kubectl get --namespace keycloak -o jsonpath="{.spec.ports[?(@.name=='https')].port}" services keycloak)
    export SERVICE_IP=$(kubectl get svc --namespace keycloak keycloak -o jsonpath='{.status.loadBalancer.ingress[0].ip}')

    echo "http://${SERVICE_IP}:${HTTP_SERVICE_PORT}/"
    echo "https://${SERVICE_IP}:${HTTPS_SERVICE_PORT}/"

2. Access Keycloak using the obtained URL.
3. Access the Administration Console using the following credentials:

  echo Username: user
  echo Password: $(kubectl get secret --namespace keycloak keycloak -o jsonpath="{.data.admin-password}" | base64 -d)
➜  ~ kubectl get pods,svc -n keycloak
NAME                        READY   STATUS    RESTARTS   AGE
pod/keycloak-0              1/1     Running   0          63s
pod/keycloak-postgresql-0   1/1     Running   0          63s

NAME                             TYPE           CLUSTER-IP      EXTERNAL-IP     PORT(S)                      AGE
service/keycloak                 LoadBalancer   100.65.56.178   10.197.107.10   80:30683/TCP,443:30631/TCP   63s
service/keycloak-headless        ClusterIP      None            <none>          80/TCP,443/TCP               63s
service/keycloak-postgresql      ClusterIP      100.66.79.76    <none>          5432/TCP                     63s
service/keycloak-postgresql-hl   ClusterIP      None            <none>          5432/TCP                     63s
Note: If you have to reinstall keycloak multiple times, delete the persistent volume claim in between, as it won’t be removed during a uninstall and can lead to issues for the next deployment.
If necessary, update your DNS record for Keycloak, and browse the UI to continue with the configuration.

Keycloak Configuration
After logging on to the “Administration Console” with the username and password defined in our helm values.yaml file, we can decide to create a new Keycloak realm or if we want to use the existing “Master” realm. Nevertheless, we will use the “Master” realm for this simplified setup.

The first configuration we must set is creating a new “groups” client scope. Click “Client scopes” on the left menu and click the blue button “Create client scope”.

Specify “groups” as the name and select “Default” under type. All default client scopes will be added automatically to new clients.

After saving everything, go to the “Mappers” tab of your newly created “groups” client scope and press “Add predefined mapper”.

Search for the predefined “groups” mapper and add it to your client scope.

Click on “groups” under the “Mapper” section of the client scope.

Enable “Add to userinfo” and click the “Save” button.

The next step is to create a Realm role. Select “Realm roles” in the left menu and click “Create role”.

Create two roles with the role name “tmc:admin” and “tmc:member“.


In this example, I am not using an external Identity Provider connected to Keycloak, such as Active Directory. Instead, I will use Keycloak itself and create local users and groups. So let’s move on and create our first user.

We will create two users, one “admin-user” and one “member-user“.

We need to set the password for the newly created user.


Repeat the steps to create a “member-user” as well. Once the users are created, we continue creating two groups, “tmc:admin” and “tmc:member“. Do not use different writing as the groups have a specific meaning in TMC Self-Managed. See the following documentation link for more details.


Next, add the “admin-user” to the newly created “tmc:admin” group.


Create a role mapping to the corresponding “tmc:admin” realm role created earlier.


Use the same approach to add the “member-user” to the “tmc:member” group and assign the “tmc:member” realm role.
The last step of the Keycloak configuration is to add a client. Click “Clients” in the left menu and the “Create client” button.

Select “OpenID Connect” as the client type and specify a client ID and name “tmc-sm“.

Enable client authentication and authorization.

Set the home URL to:
“https://pinniped-supervisor.<tmc-dns-zone>/provider/pinniped/callback”
Additionally, specify the following “Valid redirect URIs”:
“https://pinniped-supervisor.<tmc-dns-zone>/provider/pinniped/callback”
“https://pinniped-supervisor.<tmc-dns-zone>“
“https://<tmc-dns-zone>“

Confirm that the “groups” client scope has been added to our newly created “tmc-sm” client.

Lastly, note the client secret under the “Credentials” tab. We will need it for the TMC Self-Managed values files later.

Great job! We prepared everything and can now move on to installing TMC Self-Managed.
Deploy TMC Self-Managed
There is not much left besides deploying TMC Self-Managed. We define our configuration in a “values.yaml” file. The key/values configuration reference can be found here. In this example, I am using everything we have prepared so far, the Harbor FQDN and project, the DNS zone, the cluster issuer, etc… With the “loadBalancerIP” key, I am specifying which IP contour will get. Under the OIDC section, I am adding our keycloak URL, client ID, and the client secret we noted previously. We also add our CA (myCA.pem) at the end.
---
harborProject: harborvm.beyondelastic.demo/tmc
dnsZone: tmc.beyondelastic.demo
clusterIssuer: local-issuer
postgres:
  userPassword: Passw0rd
  maxConnections: 300
minio:
  username: root
  password: Passw0rd
contourEnvoy:
  serviceType: LoadBalancer
  loadBalancerIP: 10.197.107.172
oidc:
    issuerType: "pinniped"
    issuerURL: https://keycloak.beyondelastic.demo/realms/master
    clientID: tmc-sm
    clientSecret: tr0ZBnPnWDQZypis4EPCr8DWKVSmnTwq
trustedCAs:
  custom-ca.pem: |
    -----BEGIN CERTIFICATE-----
    MIIEEzCCAvugAwIBAgIUDwzxiOHnLwWKA...
    -----END CERTIFICATE-----
We create a namespace called “tmc-local” and add the TMC Self-Managed package repository that we have transferred under point 5.
➜  ~ kubectl create ns tmc-local
namespace/tmc-local created
➜  ~ tanzu package repository add tanzu-mission-control-packages --url "harborvm.beyondelastic.demo/tmc/package-repository:1.0.0" --namespace tmc-local

Waiting for package repository to be added

3:01:56PM: Waiting for package repository reconciliation for 'tanzu-mission-control-packages'
3:01:56PM: Fetch started
3:01:56PM: Fetching
	    | apiVersion: vendir.k14s.io/v1alpha1
	    | directories:
	    | - contents:
	    |   - imgpkgBundle:
	    |       image: harborvm.beyondelastic.demo/tmc/package-repository@sha256:2b19259be24efb8d05a342d8e8ad3f902c803aac4b3c4e61830e27cf0245159e
	    |       tag: 1.0.0
	    |     path: .
	    |   path: "0"
	    | kind: LockConfig
	    |
3:01:56PM: Fetch succeeded
3:01:57PM: Template succeeded
3:01:57PM: Deploy started (2s ago)
3:01:59PM: Deploying
	    | Target cluster 'https://100.64.0.1:443'
	    | Changes
	    | Namespace  Name                                                      Kind             Age  Op      Op st.  Wait to  Rs  Ri
	    | tmc-local  contour.bitnami.com                                       PackageMetadata  -    create  ???     -        -   -

...

	    | 3:01:59PM: ok: noop package/kafka.bitnami.com.22.1.3 (data.packaging.carvel.dev/v1alpha1) namespace: tmc-local
	    | 3:01:59PM: ok: noop packagemetadata/tmc-local-support.tmc.tanzu.vmware.com (data.packaging.carvel.dev/v1alpha1) namespace: tmc-local
	    | 3:01:59PM: ok: noop package/tmc-local-support.tmc.tanzu.vmware.com.0.0.17161 (data.packaging.carvel.dev/v1alpha1) namespace: tmc-local
	    | 3:01:59PM: ---- applying complete [26/26 done] ----
	    | 3:01:59PM: ---- waiting complete [26/26 done] ----
	    | Succeeded
3:01:59PM: Deploy succeeded
Finally, let’s deploy TMC Self-Managed package on our TKG cluster.
➜  ~ tanzu package install tanzu-mission-control -p "tmc.tanzu.vmware.com" --version "1.0.0" --values-file values.yaml -n tmc-local
7:15:36PM: Creating service account 'tanzu-mission-control-tmc-local-sa'
7:15:36PM: Creating cluster admin role 'tanzu-mission-control-tmc-local-cluster-role'
7:15:36PM: Creating cluster role binding 'tanzu-mission-control-tmc-local-cluster-rolebinding'
7:15:36PM: Creating secret 'tanzu-mission-control-tmc-local-values'
7:15:36PM: Creating overlay secrets
7:15:36PM: Creating package install resource
7:15:36PM: Waiting for PackageInstall reconciliation for 'tanzu-mission-control'

...

	    | 7:19:29PM:  ^ Reconciling
	    | 7:20:26PM: ok: reconcile packageinstall/tmc-local-monitoring (packaging.carvel.dev/v1alpha1) namespace: tmc-local
	    | 7:20:26PM: ---- applying complete [26/26 done] ----
	    | 7:20:26PM: ---- waiting complete [26/26 done] ----
	    | Succeeded
7:20:26PM: Deploy succeeded
Besides what you see on the command output, you can track the progress on another shell session with the following command.
➜ ~ kubectl get pkgi -n tmc-local -w
NAME                      PACKAGE NAME                                   PACKAGE VERSION   DESCRIPTION           AGE
contour                   contour.bitnami.com                            12.1.0            Reconciling           41s
tanzu-mission-control     tmc.tanzu.vmware.com                           1.0.0             Reconciling           43s
tmc-local-stack-secrets   tmc-local-stack-secrets.tmc.tanzu.vmware.com   0.0.17161         Reconcile succeeded   41s
...
After a successful deployment, we should see all TMC Self-Managed packages in a “Reconcile succeeded” state.
➜ ~ kubectl get pkgi -n tmc-local
NAME                           PACKAGE NAME                                        PACKAGE VERSION   DESCRIPTION           AGE
contour                        contour.bitnami.com                                 12.1.0            Reconcile succeeded   9m13s
kafka                          kafka.bitnami.com                                   22.1.3            Reconcile succeeded   8m37s
kafka-topic-controller         kafka-topic-controller.tmc.tanzu.vmware.com         0.0.21            Reconcile succeeded   8m37s
minio                          minio.bitnami.com                                   12.6.4            Reconcile succeeded   8m37s
pinniped                       pinniped.bitnami.com                                1.2.1             Reconcile succeeded   8m43s
postgres                       tmc-local-postgres.tmc.tanzu.vmware.com             0.0.46            Reconcile succeeded   8m37s
postgres-endpoint-controller   postgres-endpoint-controller.tmc.tanzu.vmware.com   0.1.43            Reconcile succeeded   7m28s
s3-access-operator             s3-access-operator.tmc.tanzu.vmware.com             0.1.22            Reconcile succeeded   7m39s
tanzu-mission-control          tmc.tanzu.vmware.com                                1.0.0             Reconcile succeeded   9m14s
tmc-local-monitoring           monitoring.tmc.tanzu.vmware.com                     0.0.13            Reconcile succeeded   5m22s
tmc-local-stack                tmc-local-stack.tmc.tanzu.vmware.com                0.0.17161         Reconcile succeeded   7m19s
tmc-local-stack-secrets        tmc-local-stack-secrets.tmc.tanzu.vmware.com        0.0.17161         Reconcile succeeded   9m13s
tmc-local-support              tmc-local-support.tmc.tanzu.vmware.com              0.0.17161         Reconcile succeeded   8m43s
Fantastic, let’s see if we can connect to our TMC Self-Managed UI via a browser.

So far, so good. Once we click the SIGN IN button, we will be redirected to Keycloak for authentication. We will log in with the “admin-user” to see if everything works as expected.

After logging in, we should get to the TMC Self-Managed landing page.
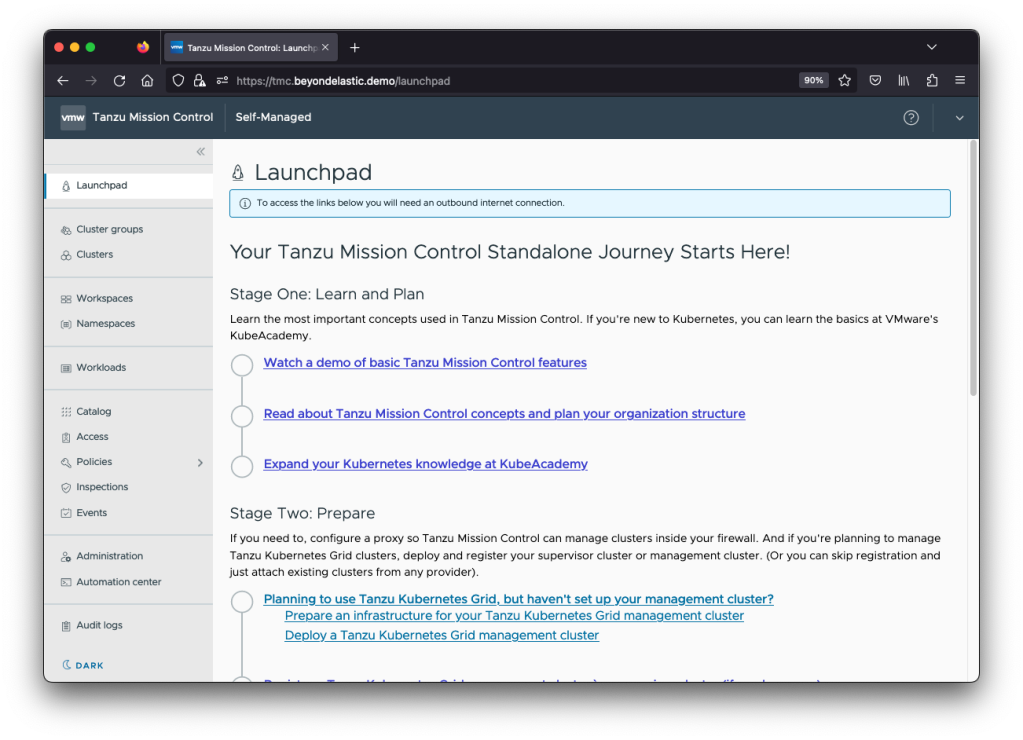
Success!!! 🎉🎉🎉
Use TMC Self-Managed
What is the first thing we want to do with our newly deployed TMC Self-Managed? Right, we want to add a Management cluster. More specifically, I want to add the TKG Standalone Management cluster of my TKG Workload cluster, which I have used for the TMC Self-Managed installation.
But first, we need to create a cluster group.

Specify whatever name makes sense for your organization or requirements.

We then jump to the “Administration” section in the left menu and select the “Management clusters” tab. Here we click on “REGISTER MANAGEMENT CLUSTER” and, in my case, select “Tanzu Kubernetes Grid”.

We give it a name, select our cluster group and click “NEXT”.

We copy the kubectl command and execute it on our TKG Management cluster.

➜ ~ kubectl apply -f "https://tmc.beyondelastic.demo/installer?id=78c831a556cfbda0eb182a16994f73d9e4dddc62f5b3308ebd3f21be80f0a19a&source=registration&type=tkgm"
namespace/vmware-system-tmc created
secret/tmc-access-secret created
configmap/stack-config created
serviceaccount/tmc-bootstrapper created
clusterrole.rbac.authorization.k8s.io/tmc-bootstrapper unchanged
clusterrolebinding.rbac.authorization.k8s.io/tmc-bootstrapper unchanged
job.batch/tmc-bootstrapper created
It can take a few minutes until all TMC pods are up and running. We can monitor the progress via the following command.
➜ ~ k get pods -n vmware-system-tmc -w
NAME                                 READY   STATUS              RESTARTS   AGE
agent-updater-6c7fbbfd95-nc92k       0/1     ContainerCreating   0          9s
extension-manager-7bc7ddfffb-gx5jj   1/1     Running             0          10s
extension-updater-6c564678d4-pmjpb   1/1     Running             0          12s
tmc-bootstrapper-vtbdg               0/1     Completed           0          106s
...
After a while, we should see the TKG Management cluster appearing in the TMC Self-Managed UI.

Note: If you get any ImagePullBackOff errors, you likely have misconfigured something with the certificate trust relationship or DNS. Ensure the CA we used for Harbor and TMC Self-Managed is configured on the TKG Management cluster.
We can now use TMC Self-Managed to deploy TKG Workload clusters. I am not going to cover the process in this post. Have a look at the official documentation here. Nevertheless, add your CA, which was used for the TMC Self-Managed installation, to the TKG Workload cluster by adding the “trust” variable.

The provisioned TKG Workload cluster should come up in the UI like this.

Troubleshooting
Here are some troubleshooting tips and commands you can use when facing issues. First, check the TMC Self-Managed package installation and if the reconciliation was successful. If not, describe the package which is in error state.
➜ ~ kubectl -n tmc-local get pkgi
...
➜ ~ kubectl -n tmc-local describe pkgi tmc-local-stack
...
Check the logs of pods belonging to the package in an error state.
➜ ~ kubectl -n tmc-local logs agent-gateway-server-86f7fb75dd-tx6zf
...
For authentication-related issues, check the pinniped CRDs and logs.
➜ ~ kubectl -n tmc-local get oidcidentityproviders,oidcclients
...
➜ ~ kubectl -n tmc-local logs pinniped-supervisor-6bfcb5f7d6-ndktf
...
Additionally, check the logs from the auth-manager pods.
➜ ~ kubectl -n tmc-local logs -l app=authenticator
Note: If you have to redeploy TMC Self-Managed due to an error or misconfiguration, always delete the entire “tmc-local” namespace and start fresh.
Summary
If you have data sovereignty requirements, air-gapped environments, or are not allowed to consume public cloud services and looking for a solution to manage your Kubernetes cluster fleet, this is for you. Tanzu Mission Control Self-Managed delivers almost the same functionality as the SaaS version. Only the integrations to other SaaS-based and public cloud offerings and the Helm chart catalog functionality are currently missing. Besides that, it is fully functional and provides a powerful policy engine, backup and restore, continuous delivery, and more for your on-prem environments. I hope this guide helps you to implement and test it yourself.

Leave a comment